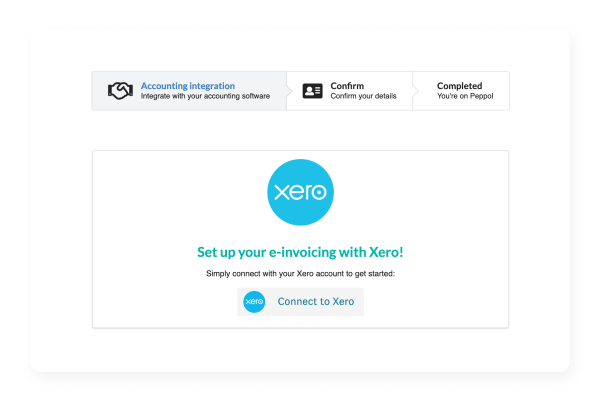
Step 1
Visit the Invoici site and navigate to the integration page. (https://connect.invoi.ci/signup/integrate) and click Connect to Xero. Log in to Xero using your Xero credentials.
Step 1
Visit the Invoici site and navigate to the integration page. (https://connect.invoi.ci/signup/integrate) and click Connect to Xero. Log in to Xero using your Xero credentials.
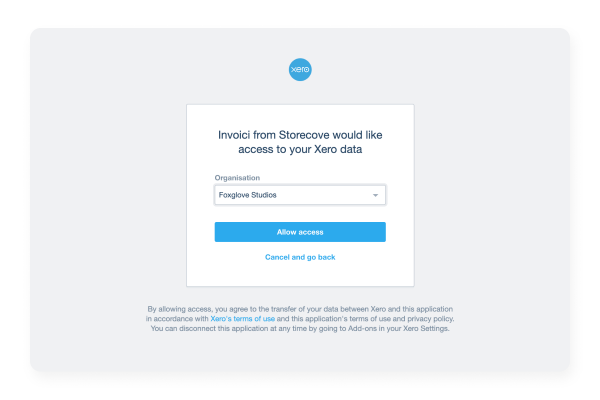
Step 2
Click Allow access and choose the Xero organization to connect to Invoici.
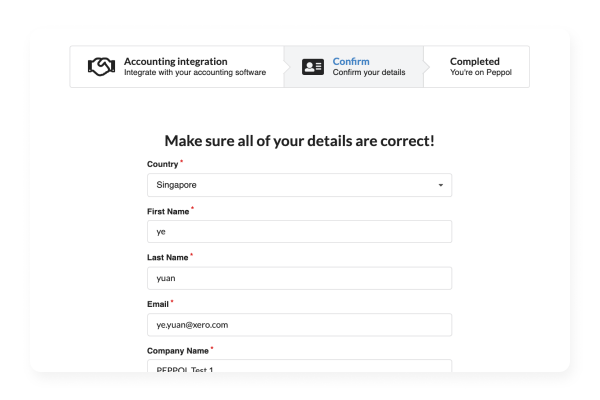
Step 3
Invoice collects organisational information from your Xero organisation. Review this information and ensure that a unique company identifier is entered in the appropriate field. This should be your organisation’s UEN (Unique Entity Number).
Step 4
Once you’re happy the information is correct, tick the checkboxes and click Confirm Details.
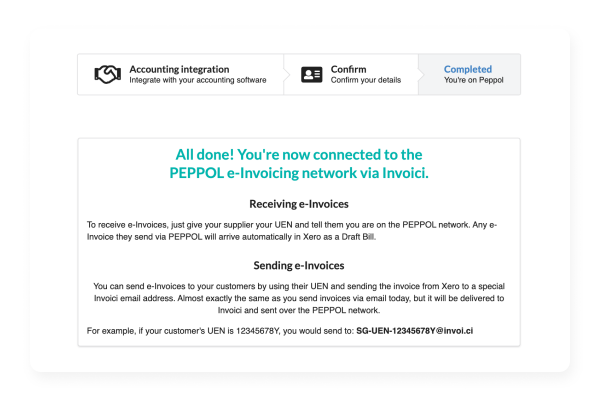
You’ll see confirmation that your Xero organisation is now connected to the Peppol e-invoicing network.
Step 1
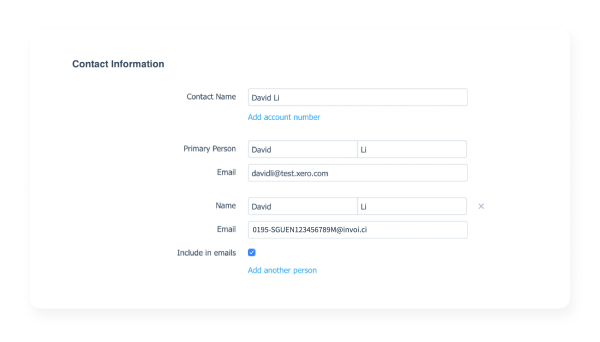
When you’re ready to send an invoice to your customer(s), select the email option and enter your contact’s e-invoicing email address. This is a unique @invoi.ci address that contains the organisation’s UEN, e.g. 0195-SGUEN123456789M@invoi.ci where 123456789M is the UEN.
Tip: Add your contact’s e-invoicing email address to the contact record in Xero.
If an email already exists, select Add another person and enter the email as a secondary address and check the box Include in emails.
Step 2
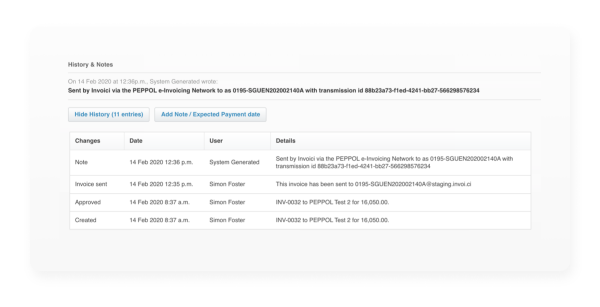
All invoices sent via the e-invoicing network will show a confirmation message along with a unique transmission ID in the History & Notes section.
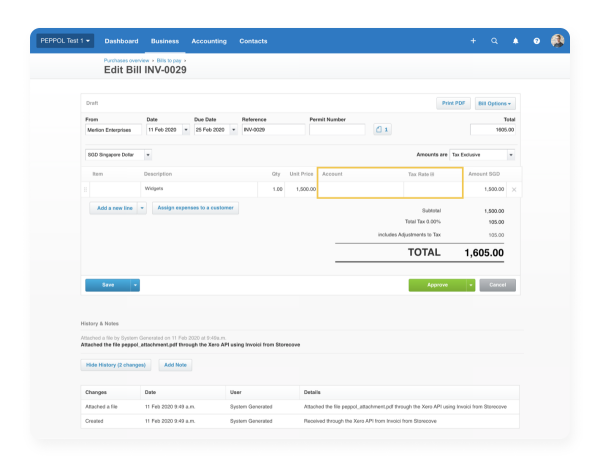
If you receive a bill (an invoice from your supplier) via the e-invoicing network, the bill will be created in a draft status. Review the bill, assign an appropriate chart of account code (eg Sales) and tax rate, and approve.